 Last updated: July 30th, 2024
Everything You Need To Know About Fixing A Squeaky Door
A squeaky door can be a symphony of annoyance in an otherwise peaceful home. The good news? This irritating screech is often a simple fix. This comprehensive guide equips you with the knowledge and tools to silence the squeak and restore peace to your home.
Unveiling the Culprits: Why Doors Become Vocal
The unassuming door, a guardian of privacy and a portal between spaces can sometimes morph into a source of unexpected annoyance – the dreaded squeak. This seemingly simple issue can disrupt the serenity of your home and leave you wondering, “Why is this happening?”
Fear not, fellow homeowner! This exploration will delve into the secret lives of doors, identifying the culprits behind the squeaks and equipping you with the knowledge to silence them.
The Common Causes For Squealing Of The Doors
When the delicate balance between friction and lubrication is disrupted, the result is an unpleasant sound – the squeak.

Here’s a closer look at the common culprits behind vocal doors:
- Loss Of Lubrication: Over time, lubricants can evaporate due to heat or collect dust and debris, rendering them ineffective. This lack of lubrication increases friction between the hinge pin and bearing surfaces, leading to the squeak.
- Loose Hinge Screws: Hinge screws are responsible for securing the hinge leaves to the door frame and the door itself. Loose screws can cause the hinge to wobble slightly during operation. This wobbling motion disrupts the intended contact between the hinge pin and bearing surfaces, again leading to friction and squeaking.
- Worn Hinge Components: The hinge pin and bearing surfaces within the hinge leaves can become worn or damaged through prolonged use. This wear can increase friction and create small gaps between the components, amplifying the squeaking sound.
- Misaligned Door: A misaligned door within its frame can put undue stress on the hinges. This stress can cause the hinge components to bind or rub against each other unintendedly, resulting in squeaking and potentially binding issues.
A Step-by-Step Guide to Effective Hinge Repair
A squeaky door’s unwelcome serenade can disrupt the tranquility of any environment. Fortunately, with a basic understanding of hinge mechanics and a few readily available tools, most door squeaks can be silenced with a DIY approach.
This guide provides a step-by-step approach to diagnosing and addressing common hinge-related issues, ensuring your doors operate smoothly and quietly.
Essential Toolkit: Gathering the Necessary Supplies
Resolving a squeaky door requires minimal effort with readily available tools and materials. To effectively silence that unwanted symphony, here’s a breakdown of what you’ll need, categorized into tools and materials:
Tools Required:
- Screwdriver: This is the most common tool needed. Depending on the hinge screw type (Phillips head or flathead), select the appropriate screwdriver.
- Hammer: A hammer can be helpful for gently tapping in loose hinge pins that are slightly bent or difficult to reinsert.
- Needle-nose Pliers: These can be useful for gripping and removing stubborn cotter pins or clips that secure hinge pins in some hinge designs.
- Flashlight: If the hinge area is poorly lit or inaccessible, a flashlight can provide illumination for better visibility during the repair process.
Materials Required:
- Lubricant: This is the key element for silencing the squeak. Choose a lubricant suitable for metal-to-metal contact. Here are your options:
- White Lithium Grease: This is the recommended choice due to its superior resistance to water washout dust buildup and ability to provide long-lasting lubrication.
- Light Machine Oil is a suitable alternative, although it may require more frequent reapplication than white lithium grease.
- Silicone Spray: Another option, but similar to light machine oil, it might need to be reapplied more frequently.
- WD-40 (Not Recommended for Long-Term): While WD-40 might provide some initial lubrication, it’s not ideal for long-term solutions. It can also displace existing lubricants and attract dust. Consider using a dedicated lubricant like white lithium grease afterward.
- Rags or Towels: Clean cloths are essential for removing excess lubricant, dirt, or debris during repair.
- Steel Wool: In some cases, light abrasion with steel wool can help remove stubborn grime or rust from the hinge pin and bearing surfaces before lubrication.
Diagnosis: Identifying the Source of the Vocalization
The first step involves pinpointing the culprit behind the squeak. Here’s how to effectively diagnose the issue:
- Auditory Inspection: Open and close the door to locate the squeak. The sound will typically originate from the hinge area.
- Visual Inspection: Carefully examine the hinge for any visible signs of damage, such as loose screws, worn components, or misalignment.
Addressing the Culprits: A Step-by-Step Guide
Once the source of the squeak is identified, you can proceed with the appropriate repair solution:
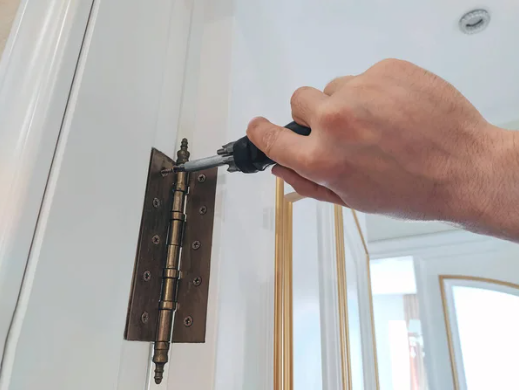
Solution 1: Tightening Loose Hinge Screws
The most common culprit behind a squeaky door is often a loose hinge screw. Fortunately, this quick and simple fix can be accomplished with minimal tools. Here’s a detailed breakdown of how to tighten loose hinge screws:
Materials:
- Screwdriver (Phillips head or flathead, depending on the hinge screw type)
Steps:
- Identify The Loose Screws: Open and close the door to determine the location of the squeak. The sound typically originates from the hinge area. Visually inspect the hinge screws for any signs of loosening. You might notice a slight gap between the screw head and the hinge itself.
- Select The Correct Screwdriver: Depending on the screw head type (Phillips or flathead), choose the appropriate screwdriver for a snug fit. Using an ill-fitting screwdriver can damage the screw head and complicate the tightening process.
- Tightening The Screws: Gently but firmly tighten each screw. It’s important to avoid over-tightening, as this can strip the screw threads or damage the hinge itself. A good rule of thumb is to tighten until there’s no more play in the hinge, but you can still turn the screwdriver comfortably.
- Test & Repeat: Once you’ve tightened all the screws, open and close the door a few times to test if the squeak has disappeared. If the squeak persists, another underlying issue might require further troubleshooting.
Solution 2: Lubricating the Hinge Pin
The most common culprit behind a squeaky door is a lack of lubrication on the hinge pin. This solution addresses this issue directly, providing a smooth and silent operation. Here’s a detailed breakdown of the lubrication process, including two options: without removing the pin and with removing the pin for a more thorough application.
Understanding the Importance of Lubrication:
Friction between the hinge pin and the bearing surfaces within the hinge leaves is the primary cause of squeaking. Lubrication creates a thin film that separates these metal components, minimizing friction and preventing the annoying sound.
Materials Required:
- Lubricant: Choose a lubricant suitable for metal-to-metal contact. Here are your recommended options:
- White Lithium Grease
- Light Machine Oil or Silicone Spray
- Rags or Towels
Process Of Lubrication
- Option A: Lubricating Without Removing the Pin (Suitable for secure and non-excessively loose pins):
- Identify the Hinge: Locate the squeaky hinge by opening and closing the door.
- Locate The Pin: The hinge pin is typically the central rod around which the hinge leaves rotate.
- Apply Lubricant: Apply a few drops of your chosen lubricant directly onto the exposed portion of the hinge pin where it enters the hinge leaves.
- Option B: Lubricating with Pin Removal (For a More Thorough Application):
- Safety First: Secure the door with a sturdy block of wood or a jack to prevent it from slamming shut while you work.
- Locate the Pin: Identify the hinge pin and any retaining mechanism (cotter pin or clip) securing it.
- Remove the Pin: Carefully remove the cotter pin or clip using the appropriate screwdriver. Then, gently slide the hinge pin out of the hinge leaves.
- Cleaning: Use a rag to remove dirt, debris, or rust from the hinge pin and the bearing surfaces within the hinge leaves. Steel wool can be used for slightly stubborn grime, but avoid excessive scrubbing that might damage the metal surfaces.
Application Of Lubricant
- White Lithium Grease: Apply a thin layer of white lithium grease to the entire pin length, ensuring all areas are covered. Spread a thin layer of grease on the corresponding surfaces within the hinge leaves, particularly where the pin makes contact.
- Other Lubricants: Apply a light coating of your chosen lubricant, avoiding over-application.
- Reassemble the Hinge: Reinsert the hinge pin and secure it with the retaining mechanism (cotter pin or clip).
Important Notes
- Wiping Away Excess: After lubrication, use a clean rag to remove any excess lubricant that might have squeezed out during application.
- Testing and Repeat: Open and close the door several times to test if the squeak has been eliminated. Repeat the lubrication process if it persists, ensuring all contact surfaces are covered with a thin lubricant layer.
- Long-Term Maintenance: For long-lasting results, consider re-applying lubricant, particularly white lithium grease, every 6 months to a year, especially on frequently used doors.
Solution 3: Addressing Worn Hinge Components
While lubrication is often the solution for a squeaky door, extensive wear on the hinge pin or bearing surfaces within the hinge leaves can render lubrication ineffective. In such cases, a more comprehensive approach might be necessary. Here’s a breakdown of the options to consider for addressing worn hinge components:
A. Replacing the Hinge Pin
- Signs of a Worn Hinge Pin: Here are some indicators that the hinge pin itself might be the culprit:
- Excessive Wear: The pin exhibits visible signs of wear and tear, such as a flattened or pitted surface.
- Looseness: The hinge pin feels loose or wobbly even after tightening the hinge screws.
- Corrosion: The pin shows signs of rust or corrosion, hindering smooth movement.
- Replacement Process: If the hinge pin is the source of the problem, replacing it is a relatively straightforward process:
- Gather Materials: You’ll need a new hinge pin of the same size and specifications as the existing one. The new pin’s diameter and length should match the original perfectly.
- Remove The Hinge Pin: Refer to Solution 2 (Lubricating the Hinge Pin) for detailed instructions on removing the hinge pin. Important Note: Remember to support the door weight when removing the pin.
- Pin Replacement: Insert the new hinge pin into the hinge leaves and ensure it fits snugly.
- Retaining Mechanism: Secure the new pin with the retaining mechanism (cotter pin or clip) on the original pin.
- Testing: Open and close the door to check if the squeak has been eliminated.
B. Replacing The Hinge Assembly
- Signs of Extensive Wear: In some cases, the wear and tear might extend beyond the hinge pin. Here are some indicators that a complete hinge replacement might be necessary:
- Worn Bearing Surfaces: The hinge leaves exhibit significant wear on the areas where the pin makes contact. This can manifest as grooves, scratches, or a misaligned hinge body.
- Loose Hinge: Even after tightening the screws, the hinge feels loose or doesn’t hold the door securely in place.
- Cracked Hinge: The hinge body shows signs of cracks or damage, compromising its structural integrity.
- Replacement Process: Replacing the hinge assembly requires more effort than just replacing the pin. Here’s a general outline:
- Gather Materials: You’ll need a new hinge assembly that matches the size and style of the existing hinge. Ensure screw hole locations and dimensions are compatible.
- Door Removal: In some situations, especially for heavy doors, removing the door from the frame might be easier for accessing the hinge screws.
- Remove The Hinge Screws: Locate and remove the screws that secure the hinge to the door frame and jamb.
- New Hinge Installation: Position the new hinge in place, aligning the screw holes. Using appropriate screws, securely fasten the new hinge to the door frame and jamb.
- Door Re-installation: If the door was removed, carefully rehang it on the new hinge.
- Testing: Open and close the door to check if the squeak has been eliminated and the door operates smoothly
Materials Required:
- Screwdriver (same type as hinge screws)
- Hammer
- Needle-nose pliers
- Replacement hinge pin (same size and specifications as the existing one)
- Replacement hinge assembly (matching the size and style of the existing hinge assembly)
- Pry bars and drills
- Rag or towel
Solution 4: Door Realignment
A DIY realignment is only recommended if the door appears aligned within its frame. Misalignment can put undue stress on the hinge and frame, potentially causing further damage. In such cases, seeking assistance from a qualified carpenter or handyman is the most prudent.
- Professional Assessment: A qualified professional can assess the extent of the misalignment and determine the appropriate corrective measures.
- Adjustment Techniques: Various techniques might be employed depending on the severity of the misalignment, such as adjusting the hinge screws, shimming the door frame, or even planning the door itself.
Home Warranties and Squeaky Doors: A Coverage Analysis
Home warranties are service contracts designed to protect homeowners from the financial burden of repairing or replacing covered appliances and home systems that break down due to normal wear and tear. While seemingly a minor annoyance, squeaky doors can be frustrating. This begs the question: Can a home warranty help fix a squeaky door?
Understanding Coverage
Home warranty coverage varies depending on the specific plan you choose and the provider you contract with. Here’s a breakdown of how home warranty coverage might apply to squeaky doors:
- Limited Coverage: Home warranties usually exclude routine maintenance and repairs that are the homeowner’s responsibility. This often includes tasks like tightening loose screws, lubricating hinges, or replacing minor hardware components. A home warranty would likely not cover the repair since addressing a squeaky door typically falls under these categories.
- Exceptions: There can be some exceptions depending on the specific cause of the squeak. For instance, if the squeak originates from a broken hinge or a malfunctioning door closer (considered a covered appliance in some plans), the warranty might provide coverage for repair or replacement.
Conclusion: A Farewell to Squeaks and a Welcome to Silence
A squeaky door, once a source of frustration, can be silenced with a little understanding and effort. This guide has equipped you with the knowledge to diagnose the culprit behind the squeak, explore suitable lubrication options, and even address scenarios involving worn hinge components.
Remember, in most cases, fixing a squeaky door is a relatively simple DIY task. With the right tools, materials, and information, you can banish those unwanted noises and restore peace to your home. So, the next time a door becomes a vocalist, don't despair! Grab your toolbox, follow these steps, and reclaim the serenity of a silent door.


related articles
 Discover First American Home Warranty Locations and What You Need to Know About Their Cover.
 Reviews of Home Warranty Companies Show You How to Determine If Your Home Is Covered


- Free Instant Quotes
- Upto $200 Off
- Free Roof Coverage